Working with your own data
The goal of our workshop is to equip you to do initial analyses with your own data! This guide will take you through how to get your data onto our RStudio server so you can begin analyzing your own data!
Things to know before uploading your data
-
If you are uploading data from human patient sequencing samples, please be sure that you are doing so in a manner that is consistent with participant consent and your institution’s rules. The only data that is permissible for upload to our server is that which has been summarized to non-sequence level and has no personally identifiable information (PII) and no protected health information (PHI).
-
Initially, we have equipped you with 50 GB of space (if the data you would like to upload is larger than this, please consult one of the CCDL team members through Slack for assistance).
-
If you don’t have your own data that you are looking to analyze, but would like real transcriptomic datasets to practice with, see the Resources for Consultation Sessions page and/or ask a CCDL team member for recommendations.
-
You will have access to our RStudio Server for 6 months. We will email you with a reminder 6 months from now so you can make sure to remove any files from our RStudio Server that you may find useful before your access is revoked and the files are deleted.
-
As always, please Slack one of the CCDL team members if you need help with anything (that is what we are here for!).
Table of Contents generated with DocToc
- Load data that is online (from a url)
- Load data from an a ssh server
- Upload large files (> 1Gb) from your own computer
- Upload small files (<1 Gb) from your own computer
- Download small files (<1Gb) to your computer
- Installing packages
Load data that is online (from a url)
If you are retrieving your data from online, perhaps from a publicly available repository, we encourage you to use the terminal command wget.
wget works for http:// https:// and ftp:// URLs.
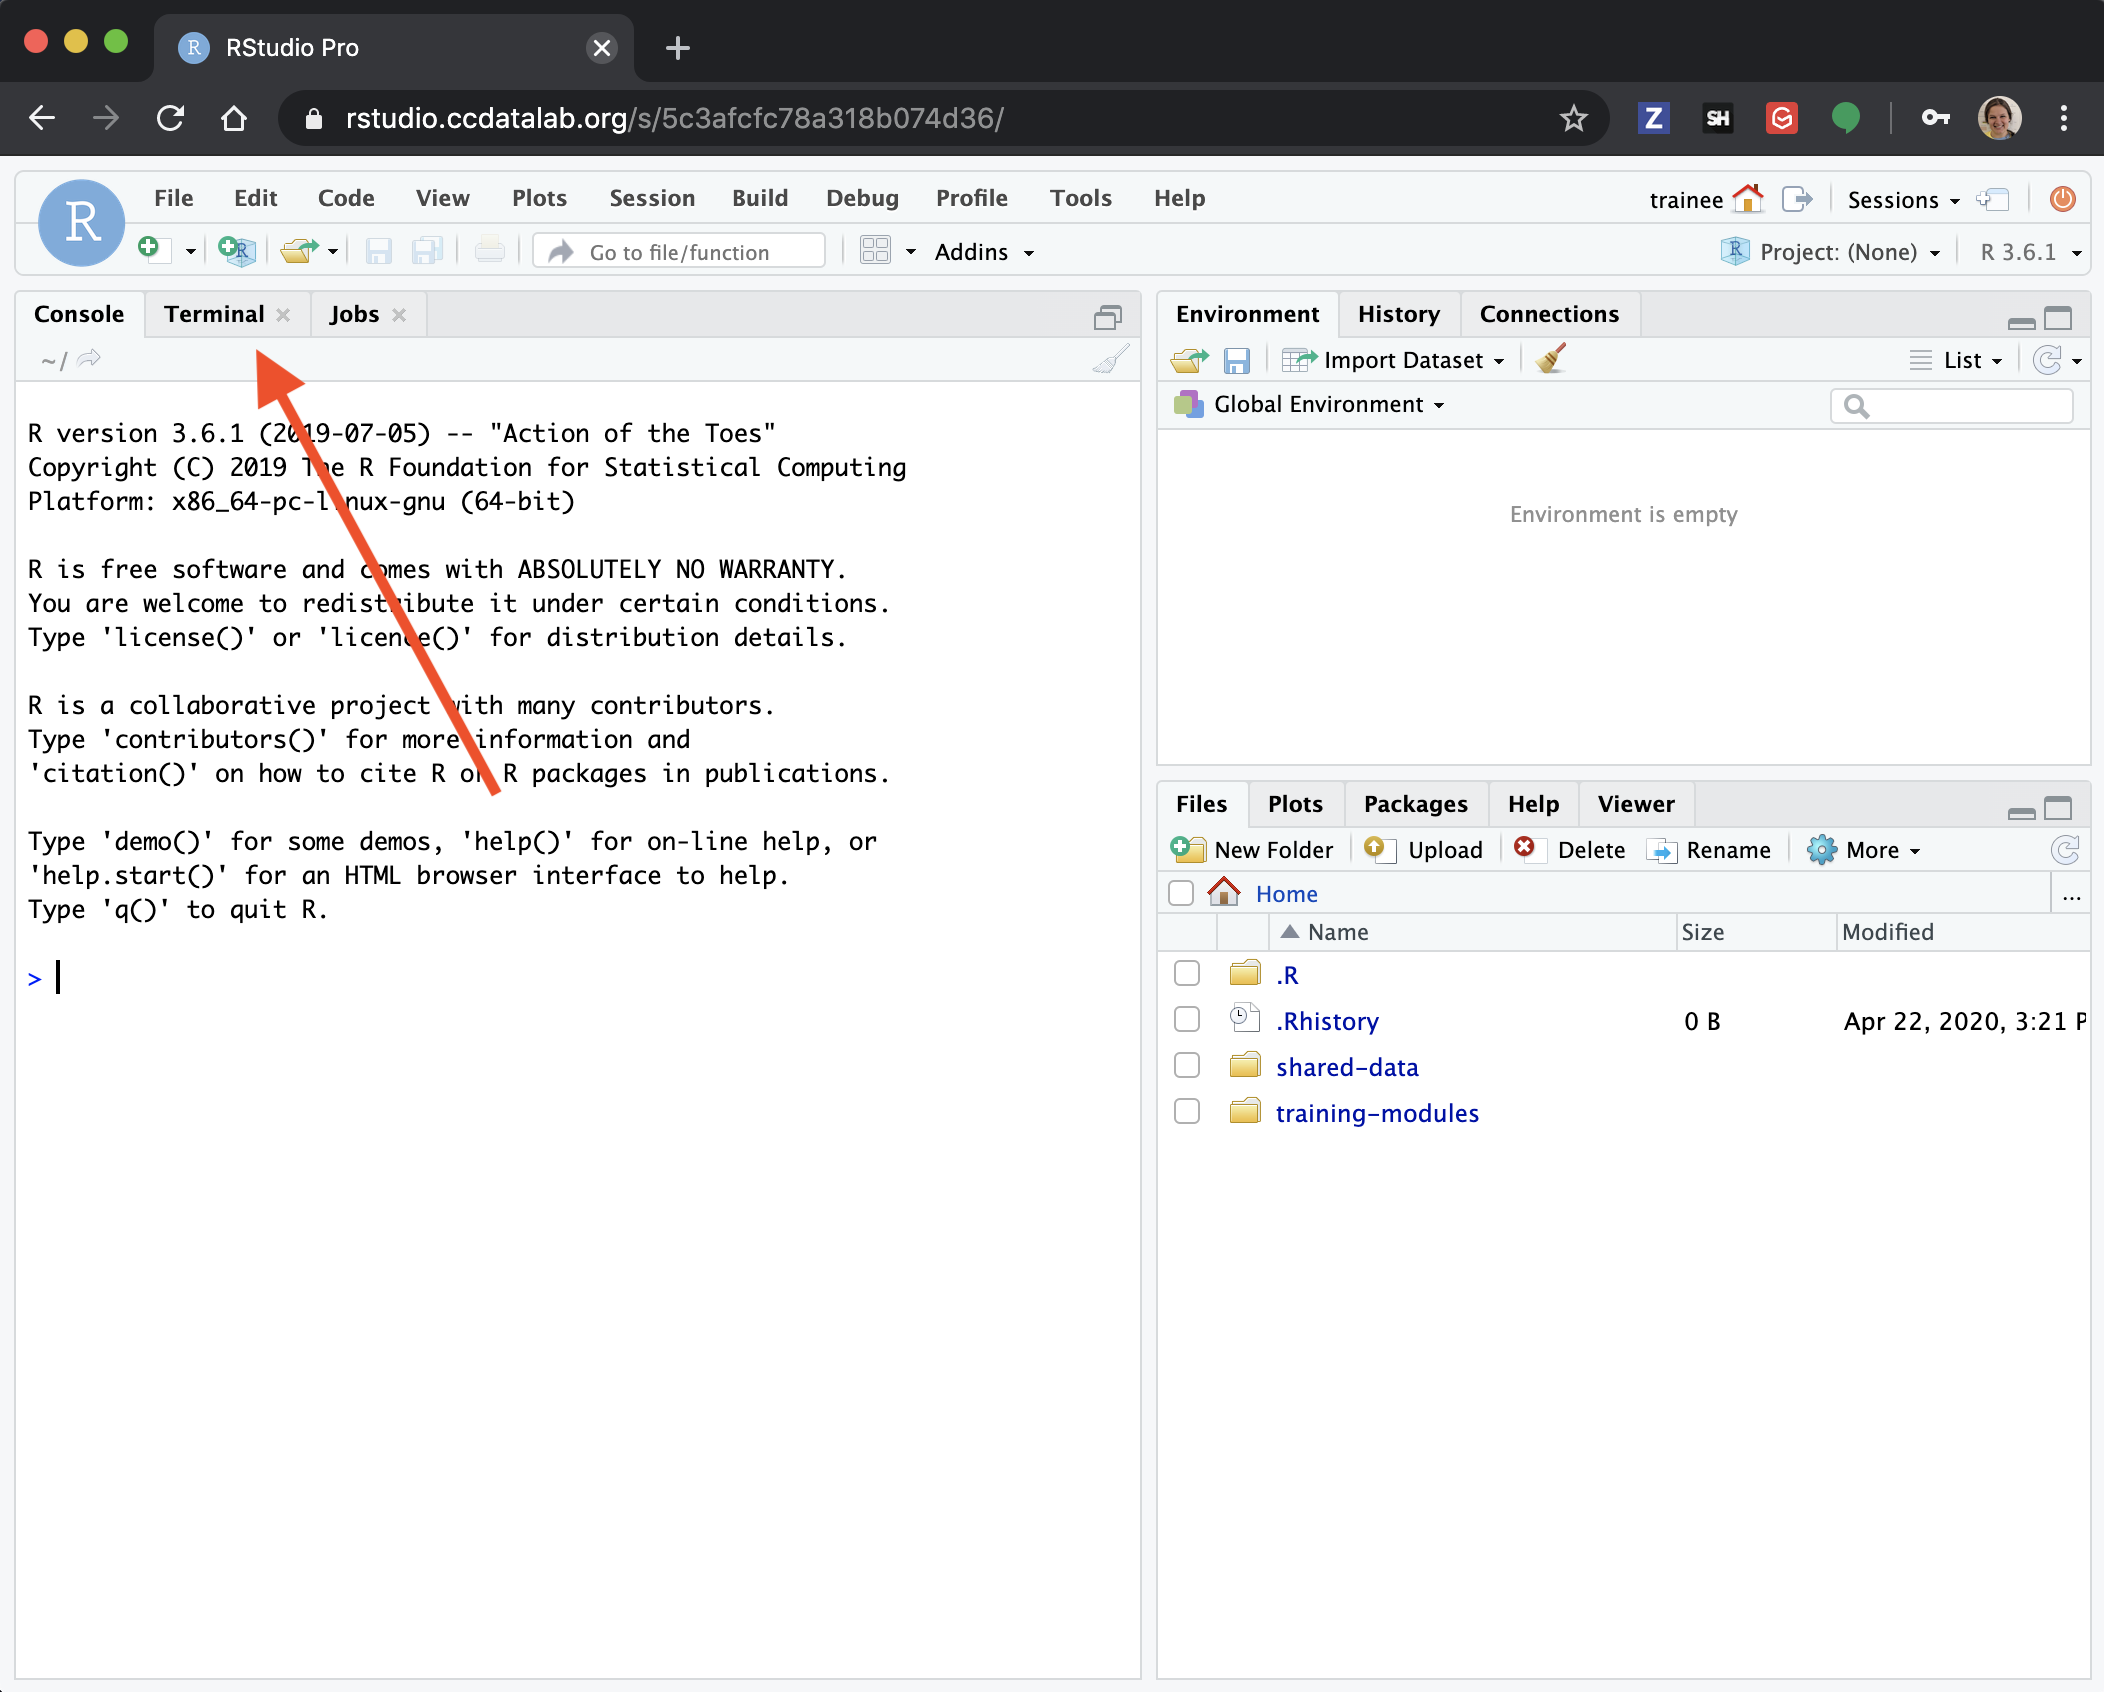
Step 1) Go to the Terminal tab in your RStudio session.
Step 2) Copy over the wget template script.
You’ll find the wget template script in the shared-data/working-with-your-data/template-script/ folder.
In the RStudio Server, you can click the check mark next to the file name, then go to More > and choose Copy To.
Step 3) Set up your wget command in the template script we started for you.
The most simple wget command just needs the URL to pull the file from.
Template:
wget <URL>
Specific example: Here’s an example of us downloading a file from ArrayExpress
wget https://www.ebi.ac.uk/arrayexpress/files/E-GEOD-67851/E-GEOD-67851.processed.1.zip
By default, the file will be saved to the current directory and the file name it had from its origin (so with the above example E-GEOD-67851.processed.1.zip).
Likely you will want to be more specific about where you are saving the file to and what you are calling it.
For that, we can use the -O, or output option with our wget command and specify a file path.
Template:
wget -O <FILE_PATH_TO_SAVE_TO> <URL>
Specific example: using the -O option Here’s another example where we will download that same array express file, but instead save it to the data folder and call it some_array_data.zip.
(Best to keep the file extension consistent to avoid troubles!)
Before we can wget the files, we should navigate to our home directory and make a data/ folder to save to.
Keeping our files organized can save us from some headaches in the future.
# Navigate to home directory
cd ~

# List the folders and files of our current directory
ls
If the ls command does not include data in its print out, it means we will need to make a data folder with the mkdir command.
# Make a new data folder
mkdir data
You can double check that you successfully made a new folder by running ls again.
Now we are ready to wget data and copy it to our data/ folder.
wget -O data/some_array_data.zip https://www.ebi.ac.uk/arrayexpress/files/E-GEOD-67851/E-GEOD-67851.processed.1.zip
-O is one of many wget command options.
To see the complete list of wget options, use the command: wget -h in Terminal.
As is recommended and also shown with this example, this dataset is zipped.
This means after you successfully wget the file, you will need to unzip it.
To unzip the contents to a particular directory, we will use the -d option.
Template
unzip -d <DIRECTORY_TO_UNZIP_TO> <FILE_TO_UNZIP>
Specific example:
Here we will unzip the contents of data/some_array_data.zip to be saved to the directory data/.
unzip -d data/ data/some_array_data.zip
Go here for more on the unzipping command.
If you have a password:
You can still use wget to obtain data if you need credentials.
We don’t recommend you put your password or any other credentials in the script or enter your password as part of a command, so you will want to type the following directly into the Terminal:
wget --user=<USERNAME> --ask-password <URL>
Using the --ask-password will prompt you to enter your password.
Load data from an a ssh server
If you are retrieving your data from an secure shell (ssh) server, like one your institution or lab may host data on, we encourage you to use the terminal command scp to copy over your files you’d like to analyze to our server.
(Make sure the data does not violate any of the privacy issues described above.)
Step 1) Go to the Terminal tab in your RStudio session.

The scp command is a way to copy files securely to or from an ssh server.
It works similarly to the cp command, which is used for copying files that are all on the same computer.
To understand how this works, we will practice cp with some files already in the RStudio Server.
Template: The first argument is the file you’d like to copy. The second argument is the folder location where you’d like to copy the file from the first argument to.
cp <FROM_FILE_PATH> <TO_FILE_PATH>
Example: First you’ll want to make sure that you are in your home directory:
# Navigate to your home directory in Terminal
cd ~
Here we will copy this notebook from its location in shared-data/working-with-your-data to our own training-modules/ folder.
cp shared-data/working-with-your-data/retrieve-SRAdb-metadata.Rmd training-modules/
Let’s double check it worked by using the ls command.
ls training-modules
You should see retrieve-SRAdb-metadata.Rmd printed out in addition to the names of the other folders and files in training-modules folder.
Here are more cp examples.
As with other commands, you can use cp --help to print out a full list of the options for cp.
Step 2) Confirm your ssh login credentials.
Your institution, or whomever gave you access to the server, should have given you a username and server address as well as more specific instructions on how to log on to the server.
Here’s very general examples info about logging into ssh.
Template Generally an ssh login will look something like this:
ssh username@server
Upon entering this command, it will probably ask you for a password.
Once you are logged into your server, you should try to confirm the file path for the data you are looking to copy.
If you are unsure of the file path of the data you are looking for, we recommend you use ls and find commands to determine this and copy down the exact file path in your script.
Step 3) Set up your scp command.
The scp command works similarly to the cp command we practiced above, except that the secure part of copying from a ssh server will require us to supply the server’s address and may require us to enter a password.
Just as we practiced with cp, the first argument is FROM the second argument is TO.
Template:
The main change with scp as compared to cp is that we will need to add the server address and a colon.
Whatever login information you used in the previous step is what you will need to use here.
Then we can use the FROM and TO file paths as before.
Remember to get rid of all < and >’s.
scp <username@server>:<FROM_FILE_PATH> <TO_FILE_PATH>
If you are copying a folder of files, you may want to use the -r option.
This will recursively copy all the files in the folder you reference:
Template:
scp -r <username@server>:<FOLDER_FROM_FILE_PATH> <FOLDER_TO_SAVE_TO>
In either situation you will likely be prompted to enter your password. You can enter it interactively; it’s best to not have the password written in a script.
Upload large files (> 1Gb) from your own computer
FileZilla is a GUI that helps transfer local files to remote servers like our RStudio Server. We recommend setting up FileZilla if your dataset is larger than a Gb or if you will transfer files to and from the RStudio Server.
Install FileZilla on Mac
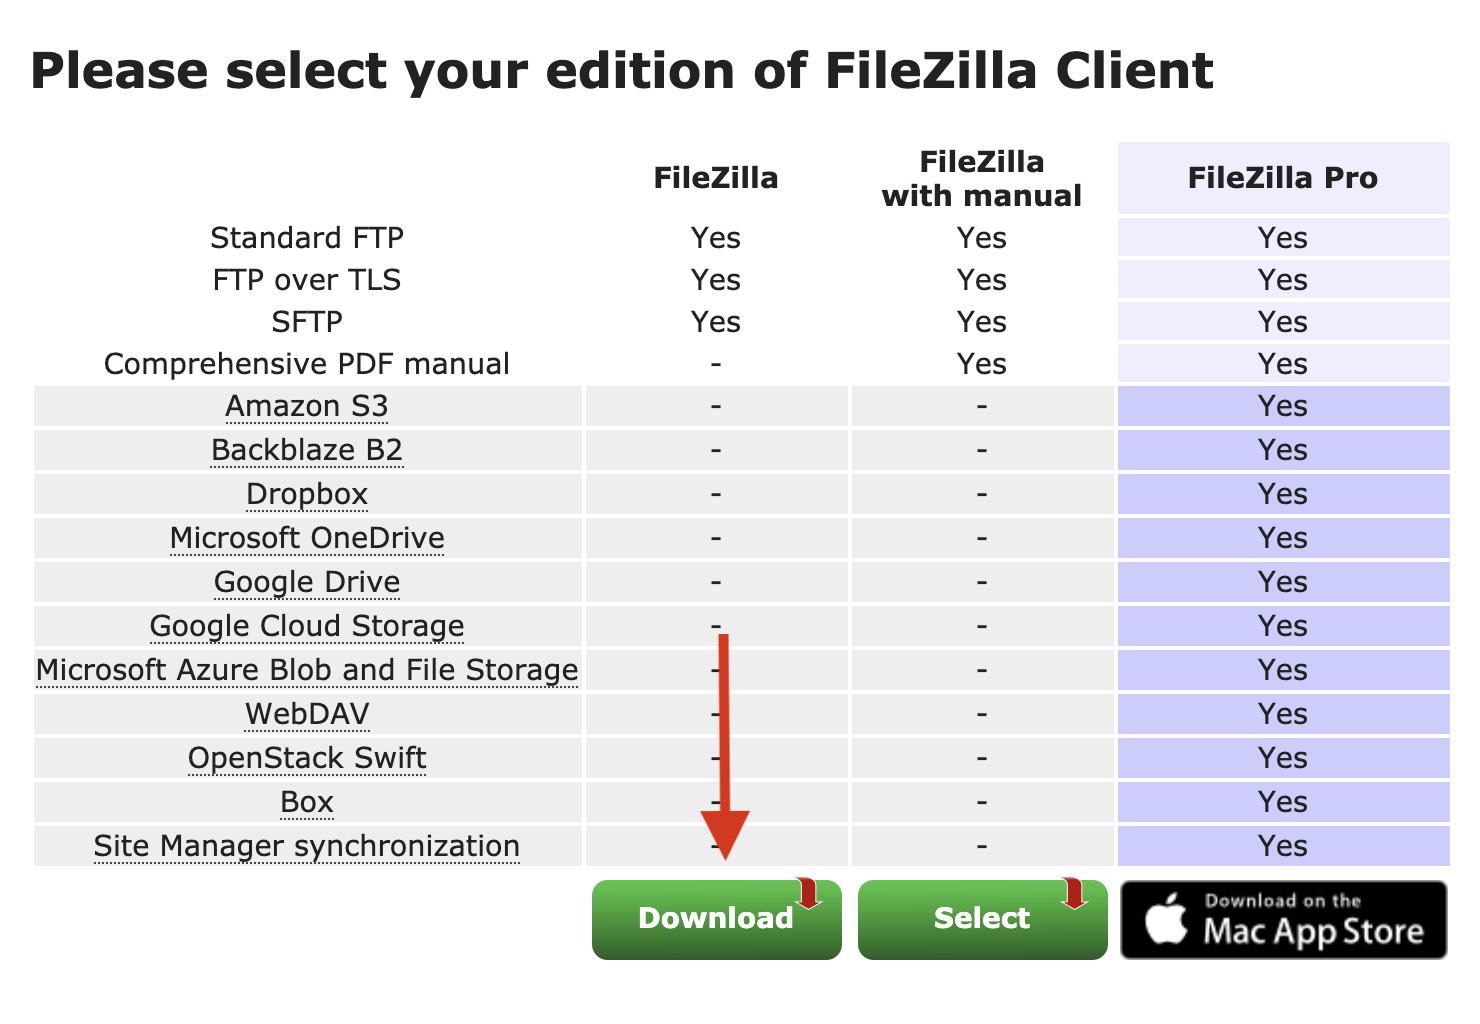
Go to FileZilla’s website to download the FileZilla Client.
Click the big green Download button.
Click Download on this next page for FileZilla this is the only free option but will have the functionality you need.
After download is complete, you’ll find the FileZilla’s .app.tar.bz2 file in your download files or you can click on it in the corner of your web browser’s screen.
Double click on the file to install.
You may want to move the App file to where your other applications are stored.
Install FileZilla on Windows
Go to FileZilla’s website to download the FileZilla Client.
Click the big green Download button.
Click Download on this next page for FileZilla this is the only free option but will have the functionality you need.

After download is complete, you’ll find the FileZilla .exe file in your download files or you can click on it in the corner of your web browser’s screen.
Double click on the file to install to begin installation.
You’ll be asked if you want to Allow FileZilla to make changes click Yes.
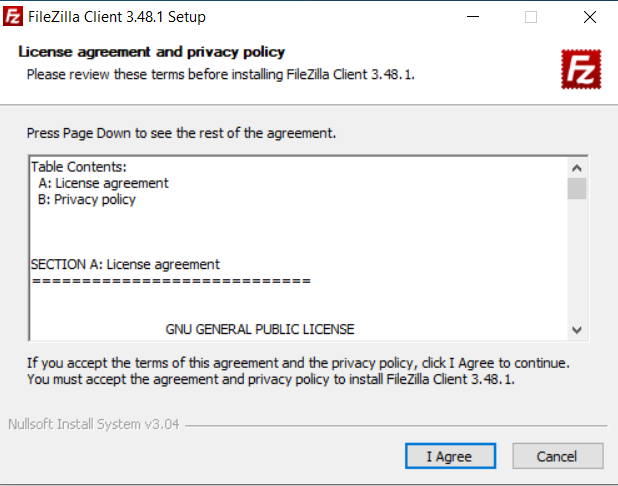
There will be a series of steps (like below) you need to click Next and Accept to them.
Install FileZilla on Ubuntu
Navigate to the Ubuntu Software Center and search for FileZilla.
Select FileZilla and then click the Install button.
Alternatively, you can install FileZilla via the command line with:
sudo apt-get update
sudo apt-get install filezilla
Linking FileZilla to the RStudio Server
Open up the FileZilla application. At the top of the FileZilla screen, you can enter in the address and your credentials for our RStudio Server (send a message to one of our staff if you forgot your username or password).

For Host, type in rstudio.ccdatalab.org.
For Username, type in the username you use to login in to our RStudio server.
For Password type in the password you use to login in to our RStudio server.
For Port, type in 22.
Then click the blue Quickconnect button.
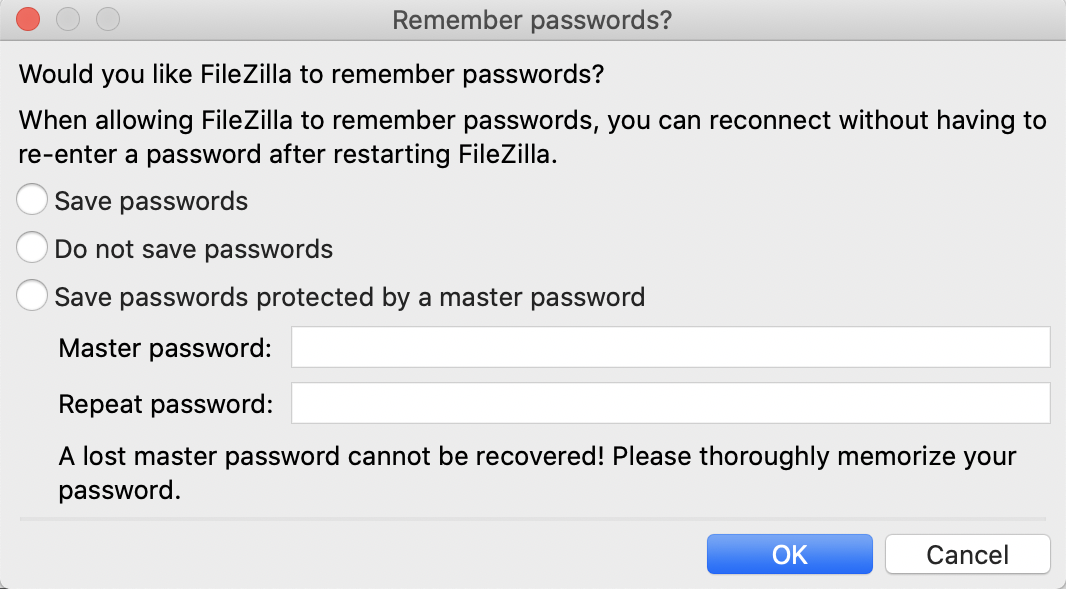
FileZilla may ask you if you want it to remember your passwords.
We’d suggest creating a master password or using Do not save password.
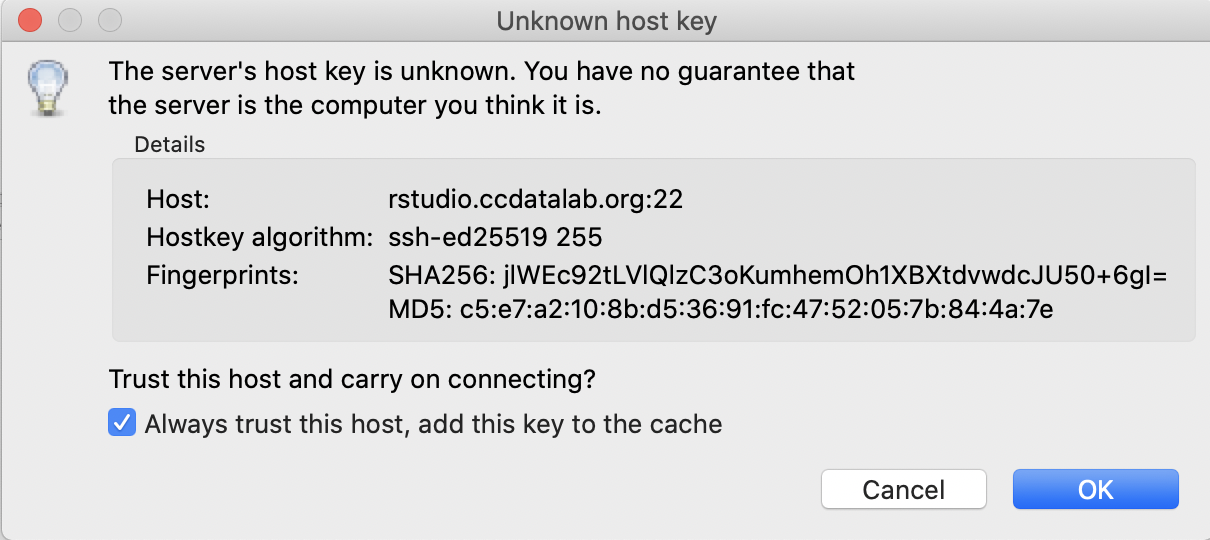
Next, FileZilla will ask you if you should trust our RStudio Server.
You can check the box for Always trust this host if you don’t want to be asked this again.
Then click OK.
Using FileZilla to upload files to the RStudio Server
The left side of the FileZilla window shows the files and folders on your computer and the right side shows the files and folders on the RStudio Server, defaulting to show the folders in your “Home” folder (which has the same name as your username).
On the right side, navigate to the folder you’d like to upload the files to on the RStudio Server.
Then, on the left, navigate to the file or folder on your computer you’d like to upload the RStudio Server.
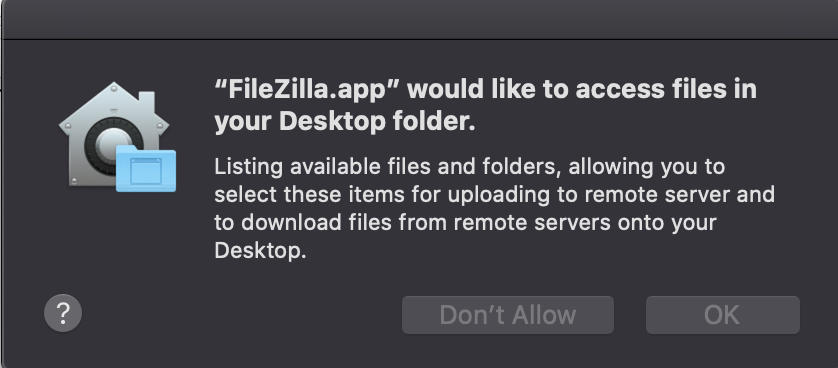
On a Mac, you will likely be asked to allow FileZilla to have access to your files.
Click OK for each time.
For the folder or file you want to upload, right click on it and choose Upload.
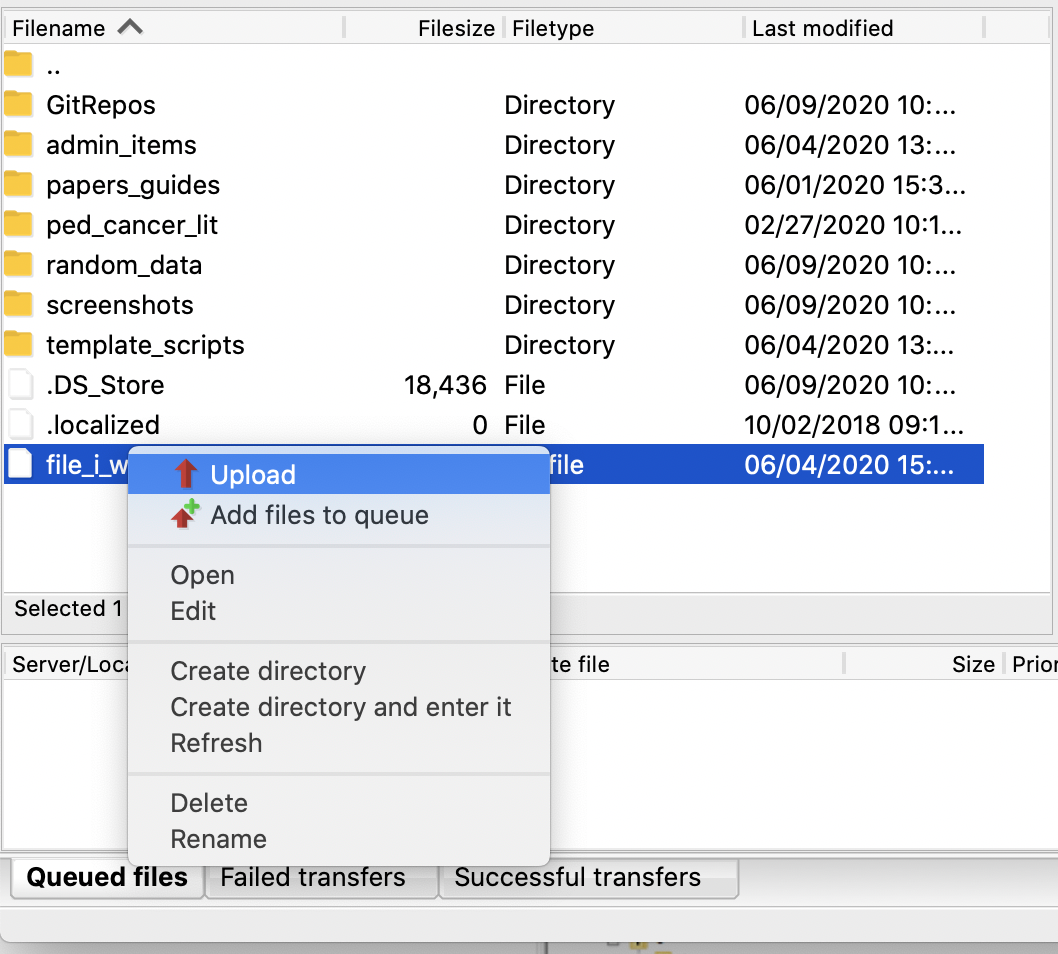
A progress bar on the bottom of the screen will tell you approximately how long it will take to upload.
Using FileZilla to download files to your computer
The left side of the FileZilla window shows the files and folders on your computer and the right side shows the files and folders on the RStudio Server, defaulting to show the folders in your “Home” folder (which has the same name as your username).
On the left side, navigate to the folder you’d like to download the files to on your computer.
Then, on the right, navigate to the file or folder on the RStudio Server you’d like to download to your computer.
For the folder or file you want to download, right click on it and choose Download.
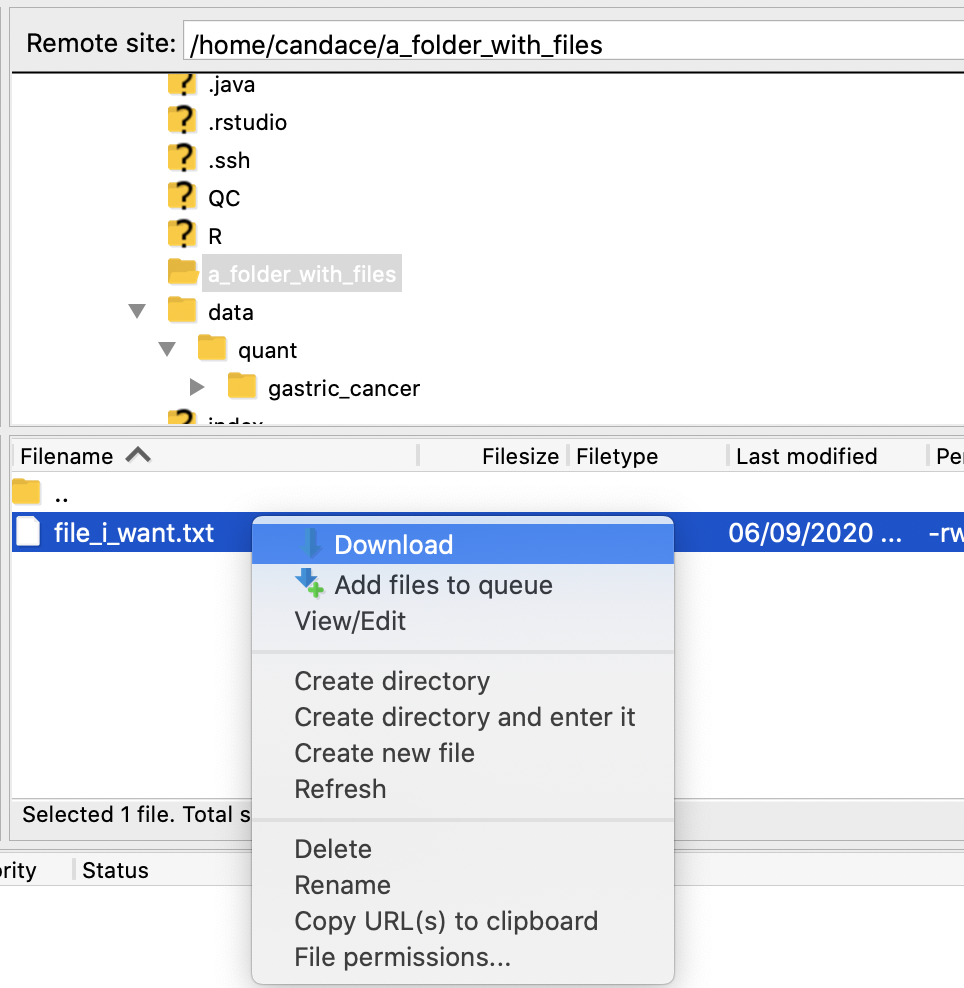
A progress bar on the bottom of the screen will tell you approximately how long it will take to download.
Upload small files (<1 Gb) from your own computer
This will only work for files smaller than 1GB
If the data you want to use is stored locally on your computer, here’s how we recommend uploading it to the RStudio Server.
Step 1) We recommend you compress your data folder into a single zip file.
For most operating systems, you can right-click on your data folder, and choose Compress to zip up your files
For reference, here’s how you compress files from the command line.
Step 2) Once your data is compressed to a single file, navigate to your RStudio session.
Step 3) Use the Upload button to choose your compressed data folder.
This button is in the lower right panel of your RStudio session:

A mini screen will pop up asking you to choose the file you want to upload:
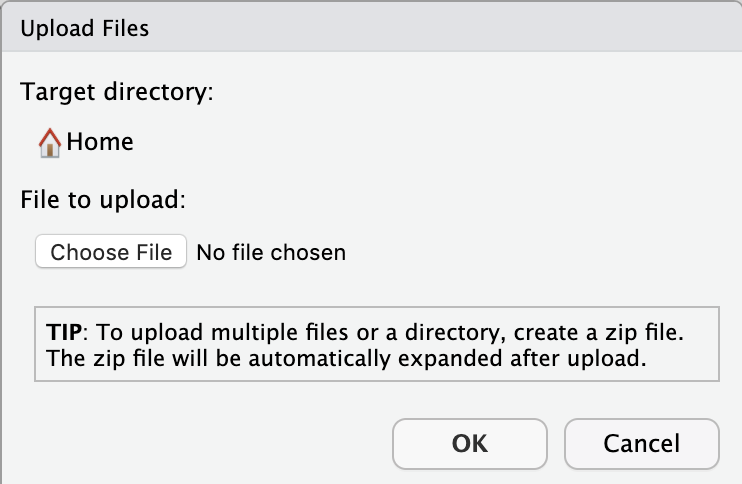
Choose your compressed data file, and click OK.
This may take some time, particularly if you have a large dataset.
When the server is finished uploading your data, you should see your file in your home directory!
It will automatically be uncompressed.
Download small files (<1Gb) to your computer
Any files on the RStudio server you would like to save to your computer you can export.
Step 1) Select the file(s) or folder(s) you would like to download Check the box(es) to the left of the files or folder(s) in the Files pane.
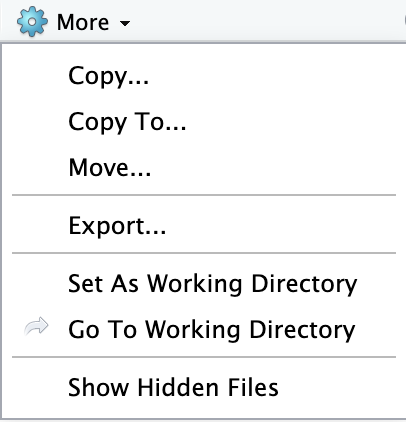
Step 2) Use the Export button!
Click on the More button with a gear next to it in the lower right pane.
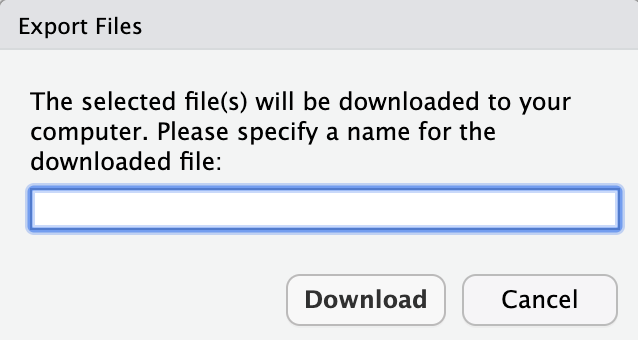
Step 3) Specify the name you would like the downloaded file to have.
Step 4) Find where the file downloaded.
Your computer may show the file in the bottom left of your browser window.
You are likely to find your files in your Downloads folder!
Installing packages
As you are working with your own data, you may find you want functionality from a package not yet installed to the RStudio server. Here, we’ll take you through some basics of how to install new packages.
Finding what packages are installed
The RStudio Server has a list of packages installed for you already.
You can see this list of installed R packages by looking in the Packages tab:
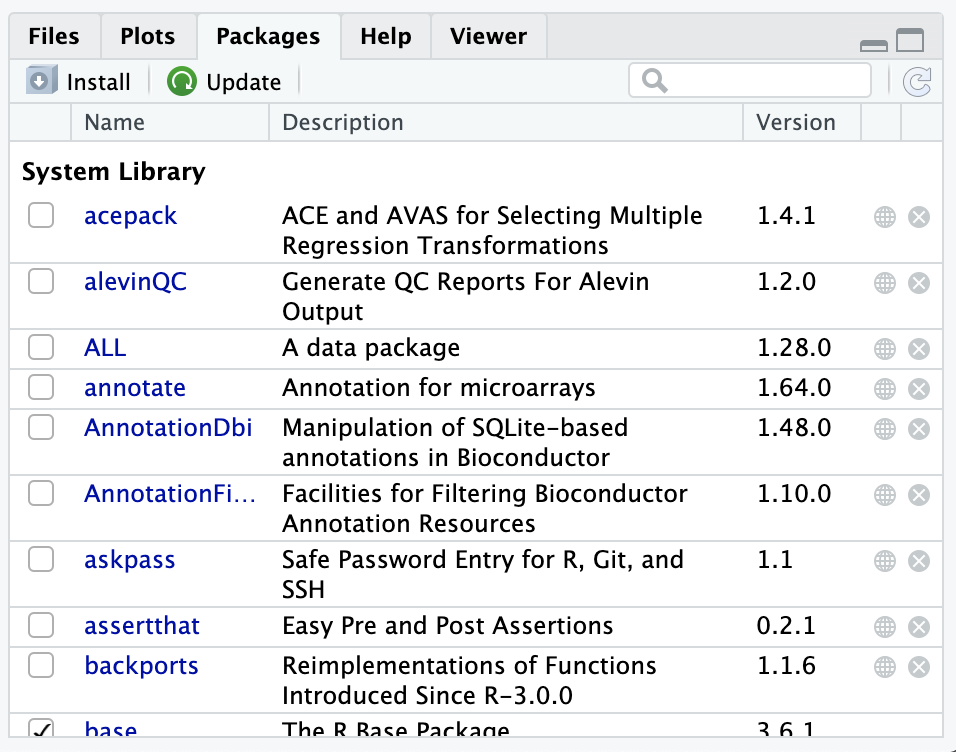
Or, by using the installed.packages() command in the Console tab.
Note that the checkmarks in the Packages tab indicate which packages are loaded currently in the environment.
Installing a new package
Here we will take you through the most common R package installation steps and the most common roadblocks. However, package dependencies, packages needing other packages to work (and specific versions of them!), can make this a hairy process. Because of this, we encourage you to reach out to one of the CCDL team members for assistance if you encounter problems beyond the scope of this brief introduction!
install.packages()
The Comprehensive R Archive Network or CRAN is a repository of packages that can all be installed with the install.packages() command.
In this example, we’ll install ggforce which is a companion tool to ggplot2 and is on CRAN.
We’ll need to put quotes around ggforce!
install.packages("ggforce")
You should see output in the Console that shows some download bars, and finally some output that looks like this:
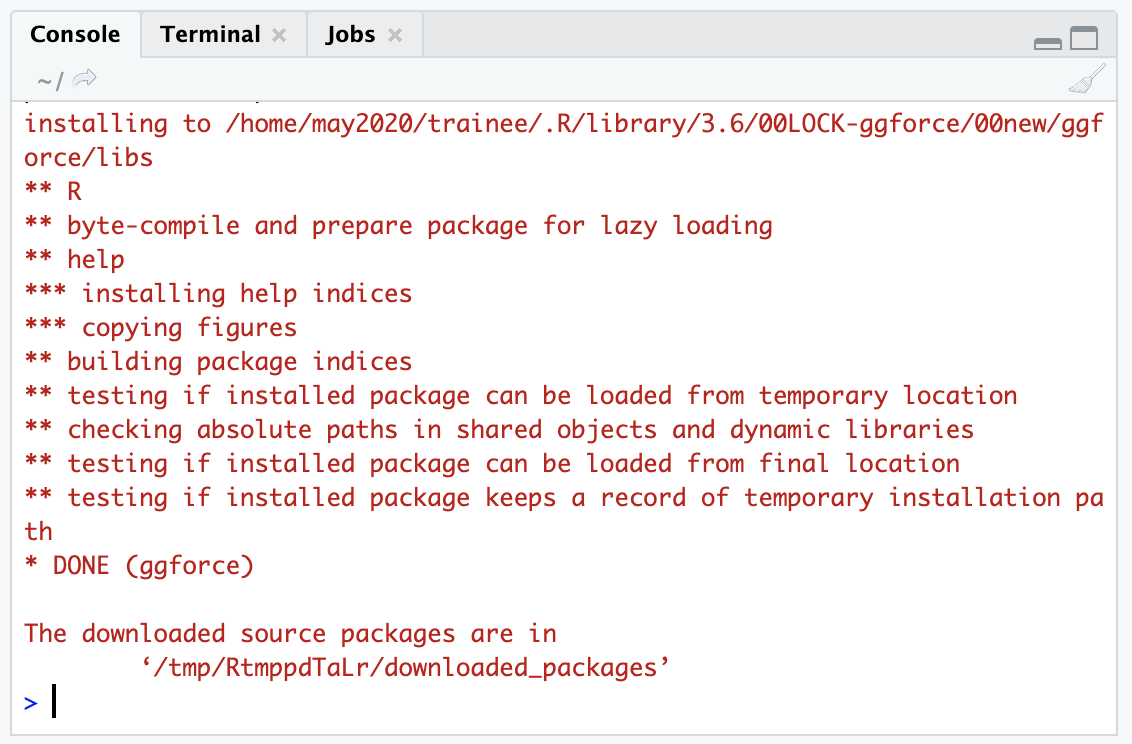
If your package installation is NOT successful, you’ll see some sort of message like :
Warning in install.packages :
installation of package ‘ggforce’ had non-zero exit status
Bioconductor packages
Bioconductor has a collection of bioinformatics-relevant packages but requires different steps for installation.
These steps depend on BiocManager to be installed.
We have already installed BiocManager for you on the RStudio server, but on your computer you could install it by using install.packages("BiocManager") like we did in the previous section (Its on CRAN).
Since BiocManager is installed, (which you can check by using the strategies in the above section) then you can use the following command to install a package.
In this example, we’ll install a package called GenomicFeatures.
BiocManager::install("GenomicFeatures")
You should get a similar successful installation message as in the previous section.
Or if it failed to install, it will give you a non-zero exit status message.